Welcome to Mise en Place, a column which takes its cue from the French tradition that literally translates to “everything in it’s place.” More than just the culinary process of prepping and assembling ingredients beforehand, Mise en Place is a state of mind. A philosophy of cooking, that will equip you will all the tips, tricks and hacks you need to embrace and elevate your inner chef!
In this edition, Heena Punwani, Pastry Chef extraordinaire at O Pedro and The Bombay Canteen (two of Bombay’s most beloved restaurants!), shares a baker’s (dozen!) keys to success. Bookmark this post, as it’s these incredibly handy tips which will make the difference between a simply-good and an utterly-great baking project, ensuring that your bakes shape up moist and with the perfect texture each time! Over to her.
I still remember the sense of wonder I experienced the first time I made meringue. Seeing the translucent egg whites transform into a glossy, billowy meringue was almost like witnessing alchemy. I retain that sense of wonder to this day whether I’m making Chhena Poda at The Bombay Canteen or Pastel de Nata at O Pedro – baking transforms simple ingredients into something joyous and wonderful.
But I know so many people, some of them great cooks, who are intimidated by baking. To them, baking seems overly complicated and fussy. While it may take a lot of technique, finesse and practice to make something like a croissant, there are a lot of simple treats that are uncomplicated and bring as much joy – who can deny the comfort of a simple, homemade cake?
I believe that anyone can bake! The mistake that most people (and recipes) make is not focusing on technique. There are certain tips and tricks that we take for granted as professional chefs. They are small things to note that can make a huge difference in the outcome, and will help you avoid common pitfalls and become a more confident baker. Here are a (baker’s) dozen keys to success for your next baking project.
1. Mise-en-place
It’s apropos that my first tip corresponds to the name of this column. This fancy French term for everything in place, is the cornerstone of prep in professional kitchens. It means getting everything ready for the recipe BEFORE you start; this includes measuring out all your ingredients, prepping your baking pans, preheating your oven, etc. It makes the entire process smooth, gets you mentally prepared, and ensures that you won’t go hunting for vanilla while your eggs are deflating or realise that you are missing a key ingredient halfway through a recipe.

2. Use a weighing scale
If there was only one tip I could give you to instantly get more consistent results, this would be it! If you bake regularly, get a weighing scale. It’s quicker, simpler and most importantly, always accurate. Ingredients when weighed by volume can vary widely by weight. For example, 1 cup of flour will be different when weighed depending on how it was stored, scooped, and a dozen other factors. But 125 gm of flour is always 125 gm no matter how you weigh it. Eggs are another big culprit when it comes to inconsistencies. Eggs that we get in India do not come in a standard size, so 2 eggs can weigh anywhere between 80-120 gm. These inconsistencies are sometimes minor, but many times they are significant enough to alter the end result. So if you’re a regular baker, I’d recommend investing in a good weighing scale. It also makes prep and cleanup easier. You just have to dump everything in your mixing bowl, and all you have to worry about is that the numbers match.
3. Know and understand your oven
When people message me the problems they encounter – top/bottom burnt, middle uncooked, etc. – it almost always has something to do with the oven. Always, preheat your oven for at least 15-20 minutes BEFORE you put in your batter, dough, etc. for the time prescribed in the recipe. All ovens work differently, so it is important to understand how your oven works. When working with a new recipe, I always keep the timer for 10 mins less than the prescribed time in the recipe, and then increase it in increments until it’s done. A good recipe will also give you visual cues along with a time range – for example, a knife inserted in the centre should come out clean or the top should be set, etc. Pay attention to these visual cues to determine doneness rather than the time.
Most people keep both the heating elements on (bottom and top broiler element) while baking. Through experience, I’ve realised that in a small, countertop home oven, the top element is usually too close to the top of your cake, etc. resulting in the top burning before the middle can cook completely. That’s why I always use only the bottom element for baking cakes, cookies, tarts, etc. in my home oven. I keep both the elements on only very rarely towards the end of baking, if I feel the top needs more colour in the case of pies, crumbles, etc. The only things that I use both the elements for are hearty breads like sourdough, and roasting chicken, meat, etc. Again, all ovens are different, so understand how yours works, but if the top of your cake is burning before the inside is cooked, this is probably the reason.
4. Pay attention to the temperature of your ingredients
A good recipe will indicate the temperature of the ingredients. It’s important while making cakes that all your ingredients are at room/same temperature (unless otherwise indicated in the recipe) to get a smooth, properly emulsified batter and a beautiful, even crumb. Note that “room temperature” in India is much hotter – when it comes to butter, make sure that it’s soft enough that your finger makes a dent, but not so soft that it goes right through and is oily. It should still feel cool. If you’ve forgotten to take eggs out from the fridge, place them (unbroken) in warm (not hot) water for 5 minutes.
5. Don’t overmix
The key to tender baked goods is to not overwork the mixture. Most recipes will tell you to not overmix once you’ve added the flour to your batter. Overmixing/kneading once liquid is added, develops the gluten in flour – desirable in breads, but not in cakes, cookies, etc. where you want a tender crumb. Overmixing will result in a dense and tough end product. Mix/fold only until the flour has been incorporated. In case of whipping eggs or cream, over-whipping will cause the mixture to break. Start whipping at low speed, and increase the speed gradually to get a more stable foam. Never walk away while your egg/cream is being whipped (in a stand mixer, for example) and whip only until you get the result (smooth batter or soft/stiff peaks, etc.) indicated in the recipe.
6. Read the recipe
This may seem obvious, but read a recipe COMPLETELY and with full attention before you start. This will help you be better prepared. Otherwise, you can enthusiastically start a recipe with guests coming in only to realise that the batter needs an overnight rest. (This has, ahem, never happened to me.)

7. Clean as you go
This applies to all cooking as well as baking (and I guess to life?). Clearing out the clutter makes it a much more efficient and joyful process. Put away anything you don’t need, and clean down your work station as you go (I also keep a bowl on the side to collect all the scraps). You will be less distracted and overwhelmed, and will sidestep the scenario where your kitchen looks like it’s been hit by a tornado when you’re done.. (Bonus tip: let your greasy vessels soak for 5-10 minutes in hot water and soap; cleaning will become much easier.)
8. Sift/whisk your flour
There is debate on whether this is important, but I always sift my flour. Sifting aerates the flour and removes any lumps/impurities especially if the flour has been sitting on the shelf for a long time. Sift other dry ingredients like baking powder/soda/cocoa with the flour and whisk to make sure that the ingredients are evenly distributed.

9. Don’t use dark pans
Use light coloured pans/sheets for baking cakes, cookies etc. especially in a small home oven. Dark pans absorb more heat and can cause the bottoms and sides of your baked goods to get too brown before the interior bakes properly. You will probably end up with a thick, brown crust in the case of cakes and burnt bottoms in the case of cookies. I use dark pans when I specifically want browning – for breads or for roasting meats, etc.
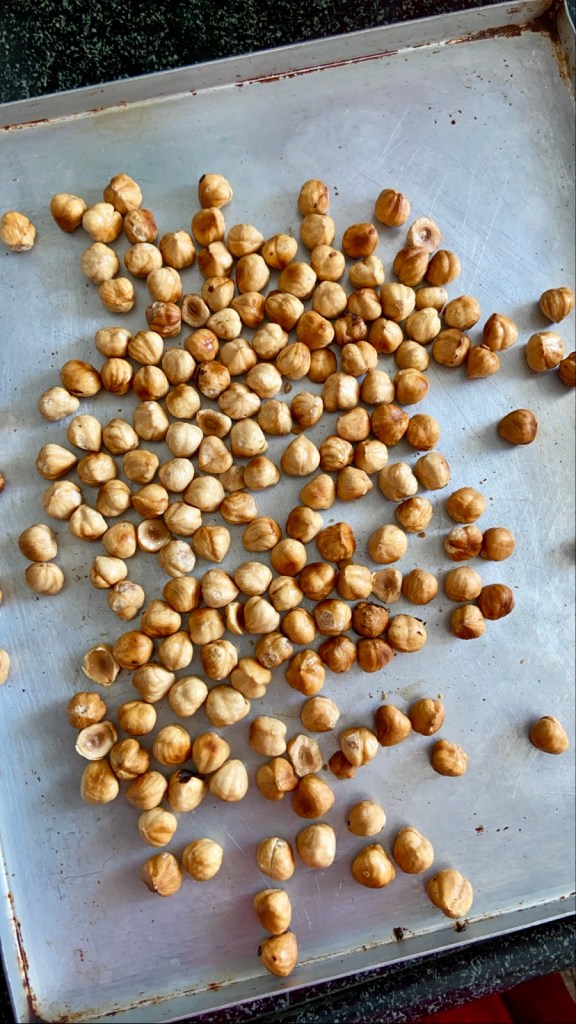
10. Toast your nuts
Toasting nuts releases their oils and makes them taste more flavourful and well, “nuttier”. It also ensures that the nuts don’t get soggy in the batter while baking. Toast nuts in a single layer on a baking sheet in a preheated oven at 175° C (160° C for convection) for 8-10 mins until golden brown. You can also toast them in a pan on the stovetop – use a medium flame and be sure to stir, they can burn easily.
11. Scrape scrape scrape
Stopping and scraping down your bowl while mixing your batter/dough is a simple but important step to ensure that it is smooth and evenly mixed with no dry/heavy bits stuck at the bottom or sides of the bowl. A rubber/silicone spatula is a great and underrated tool for baking. It helps you gently fold, mix and scrape like nothing else can.
12. Don’t use fake whipping cream
Everyone in my pastry team knows that my pet peeve is using Richs or similar fake whipping creams. It says “Dairy free cream” upfront and has a list of ingredients you can’t recognise. Skip the fake stuff. I use Amul fresh cream (because it’s consistent and stable), and if you think you can’t whip it, I’m going to give you my hack for it!
European/American whipping creams have 35% fat, and therefore, whip very easily. Amul Fresh Cream, on the other hand, has only 25% fat, and is therefore, really difficult to whip. Hack:
- Place your carton of Amul fresh cream in the coldest part of your fridge (not freezer) for at least 24 hours. 2-3 days is even better. The colder it is, the better.
- Don’t shake the carton when you take it out (this is very important!). Snip one corner, and when you pour it out, the thick part of the cream will automatically separate from the watery part, which you can discard.
- For whipping the cream, place your empty bowl and whisk in the freezer for about half an hour before you need it. Place the thick, cold cream in the bowl, and whip with a hand mixer or in a stand mixer. If your kitchen is really hot, do this by placing the bowl over an ice bath (a larger bowl with ice + water in it).


13. Have fun
While cooking is essential to survive, baking is for pleasure. So enjoy the process. If you are stressed to begin with , chances are you’ll mess up a lot more. Have faith and confidence in yourself. Even if you don’t end up with something perfect, remember that imperfect dessert is still better than no dessert, and if you bake with love, people will appreciate it no matter how it turns out. As with everything else, practice makes perfect. So have fun and enjoy your dessert!
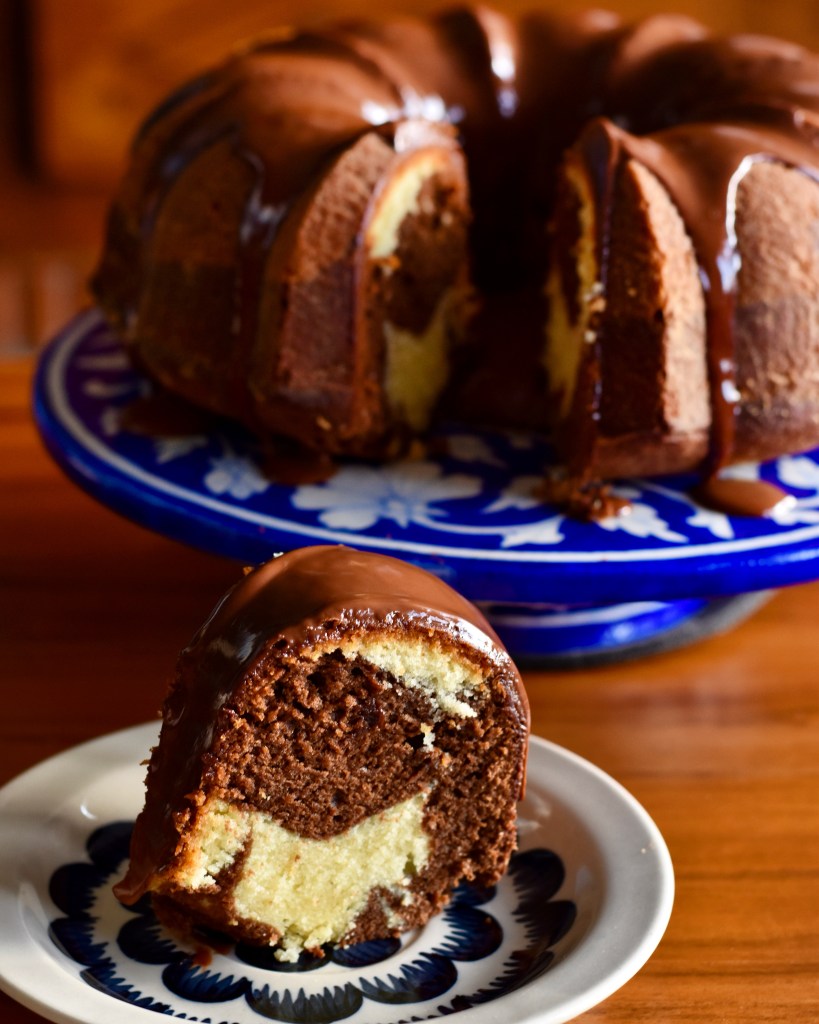
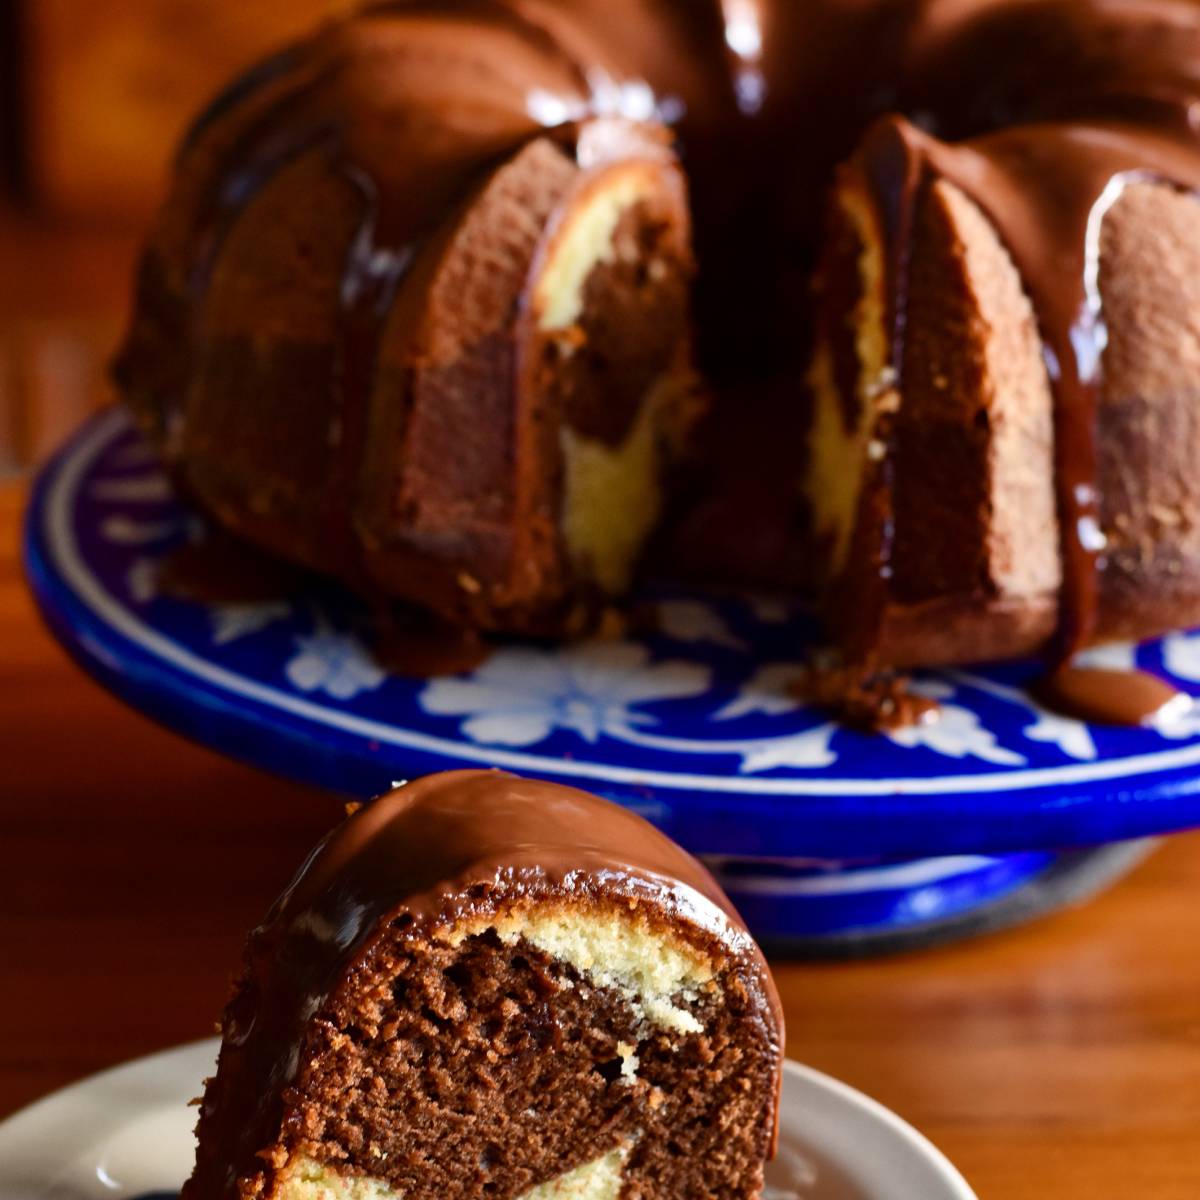
To get you started, Heena has shared The Bombay Canteen’s signature recipe for The Canteen Mawa Cake – arguably the best Mawa Cake in Bombay! Try it, here.
For more tips & baking adventures, follow Heena @TiffinTales @TheBombayCanteen @Opedro


Leave a Reply